Using mlpack in other applications under Visual Studio 2015
If you want to write your own application and link mlpack against it, you will need to add the include directories of mlpack to your project and add mlpack.lib to the libraries you link against.
Let’s do it accordingly to Once again… guide.
Prerequisites
First of all OpenBLAS libraries should be copied to C:/Windows/System32/ and those are:
~\OpenBLAS.0.2.14.1\lib\native\bin\x64\libgcc_s_seh-1.dll
~\OpenBLAS.0.2.14.1\lib\native\bin\x64\libgfortran-3.dll
~\OpenBLAS.0.2.14.1\lib\native\bin\x64\libopenblas.dll
~\OpenBLAS.0.2.14.1\lib\native\bin\x64\libquadmath-0.dll
or
~/OpenBLAS.0.2.14.1/lib/native/bin/x32/libgcc_s_seh-1.dll
~/OpenBLAS.0.2.14.1/lib/native/bin/x32/libgfortran-3.dll
~/OpenBLAS.0.2.14.1/lib/native/bin/x32/libopenblas.dll
~/OpenBLAS.0.2.14.1/lib/native/bin/x32/libquadmath-0.dll
And also libopenblas.dll.a from:
~/OpenBLAS.0.2.14.1/lib/native/lib/x64/libopenblas.dll.a
Warning: This is of course optional, but it’s easier later to include each one as Additional Dependency
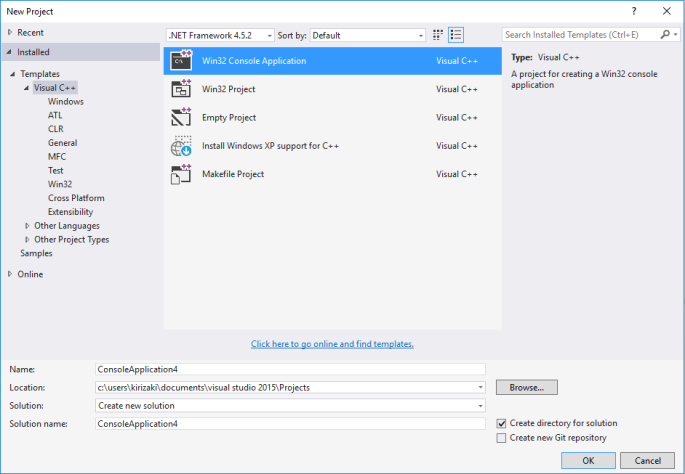
1. Create New Project
Let’s create new project and paste example code from mlpack tutorials mlpack Input and Output
Warning1: Remember to change Solution Configuration to Debug/Release & Solution Platform to x64/x86 – it’s dependent from how mlpack & armadillo was compiled.
Warning2: Don’t forget to include #include “stdafx.h” & #include <iostream> or just copy this snippet:
#include "stdafx.h"
#include <iostream>

#include "mlpack\core.hpp"

int main(int argc, char** argv)
{
	//pass main's arguments..
	mlpack::CLI::ParseCommandLine(argc, argv);

	//some_timer starts ticking..
	mlpack::Timer::Start("some_timer");

	//some outputs..
	mlpack::Log::Debug << "Compiled with debugging symbols." << std::endl;
	mlpack::Log::Info << "Some test informational output." << std::endl;
	mlpack::Log::Warn << "A warning!" << std::endl;

	//better comment it or..
	//mlpack::Log::Fatal << "Program has crashed." << std::endl;
	mlpack::Log::Warn << "Made it!" << std::endl;

	//some_timer stops..
	mlpack::Timer::Stop("some_timer");

	return 0;
}
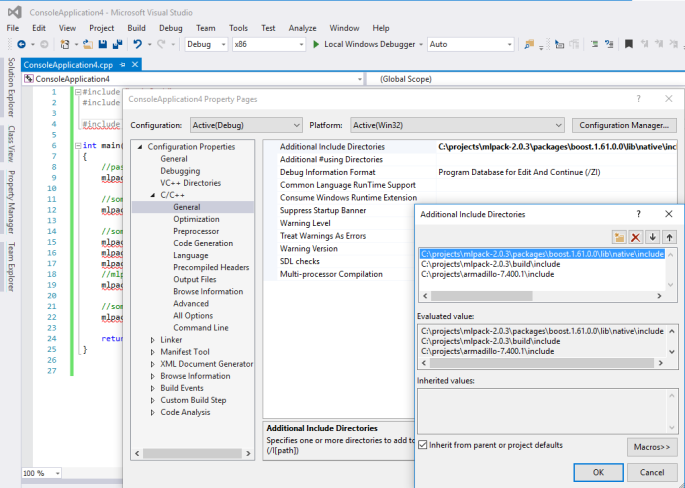
2. Compiler Additional Include Directories
Go to Project > Properties > C/C++ > General and add mlpack, armadillo and boost include directories:
~/armadillo-7.400.1/include
~/boost.1.61.0.0/lib/native/include
~/mlpack-2.0.3/build/include
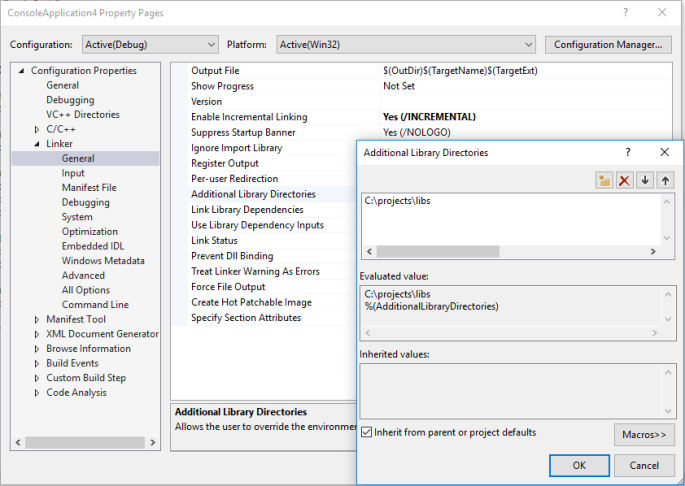
3. Compiler Additional Library Directories
Create following folder:
C:/projects/libs
and copy there all files listed below:
mlpack.lib/dll (depends on how mlpack and armadillo target was compiled)
armadillo.lib/dll (same as above)
~/boost_math_c99-vc140.1.60.0.0/lib/native/address-model-64/lib/*
~/boost_program_options-vc140.1.60.0.0/lib/native/address-model-64/lib/*
~/boost_unit_test_framework-vc140.1.60.0.0/lib/native/address-model-64/lib/*
~/boost_serialization-vc140.1.60.0.0/lib/native/address-model-64/lib/*
~/boost_random-vc140.1.60.0.0/lib/native/address-model-64/lib/*

* - whole folder
Go to Project > Properties > Linker > General and add C:/projects/libs
4. Linker Additional Dependencies
Go to Project > Properties > Linker > Input and add C:/libraries/mlpack.lib
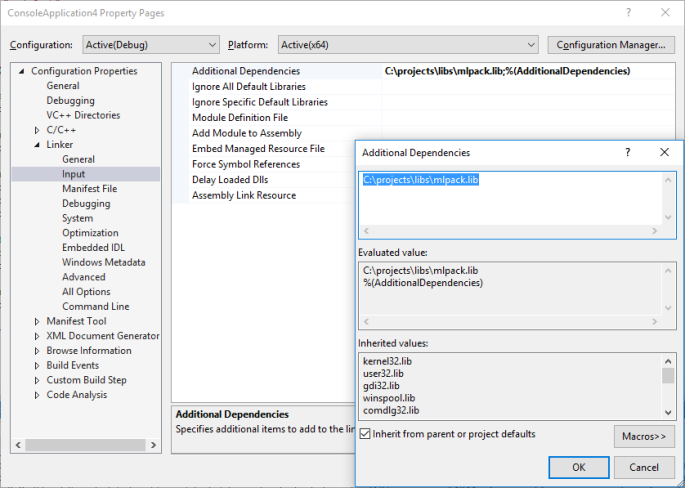
Warning: Additional Dependencies (mlpack.lib or mlpack.dll) should point to the same .lib/.dll from Additional Library Directories (C:/libraries/mlpack.lib or C:/libraries/mlpack.dll)
5. Compile & Run
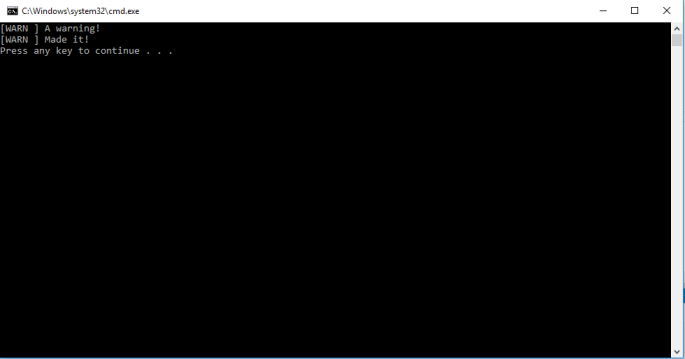
Output should be:
[WARN ] A warning!
[WARN ] Made it!
Press any key to continue . . .
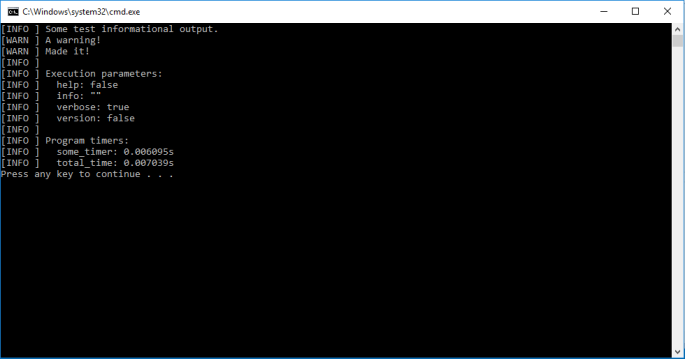
or in verbose mode with -v as input argument for application:
[INFO ] Some test informational output.
[WARN ] A warning!
[WARN ] Made it!
[INFO ]
[INFO ] Execution parameters:
[INFO ]   help: false
[INFO ]   info: ""
[INFO ]   verbose: true
[INFO ]   version: false
[INFO ]
[INFO ] Program timers:
[INFO ]   some_timer: 0.002928s
[INFO ]   total_time: 0.004584s
Press any key to continue . . .
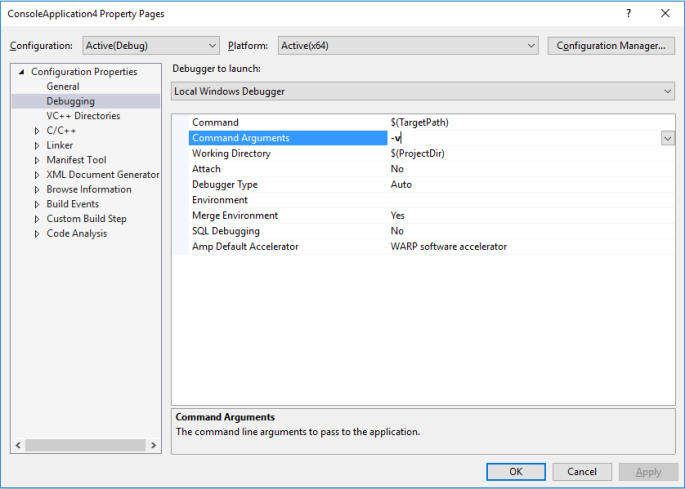
This can be done by going to Project > Properties > Debugging and setting Command Arguments: -v
TODO:
- Prepare weekly challenge
- Maximize Japanese lessons
- Finish story with mlpack::backtrace under Windows
